Work by Location

Monmouthshire Tile Doctor Work History Banner

Welcome to my Work History archive where you will find detailed examples of Tile, Grout and Stone Cleaning and renovation work carried out within Monmouthshire.

I have organised the posts by the most populous locations throughout Monmouthshire, if I haven’t listed your location do get in touch, Tile Doctor covers the whole country so if I can’t cover it there’s a good chance one of my colleagues can.

Local towns and villages I cover include: Abergavenny, Blackrock, Blackwood, Bryngwyn, Caerwent, Caldicot, Capel-y-ffin, Chepstow, Crick, Cwmcarvan, Cwmyoy, Dingestow, Gilwern, Glascoed, Govilon, Grosmont, Kemeys Commander, Kemeys Inferior, Little Mill, Llanarth, Llanbadoc, Llanddewi Rhydderch, Llandenny, Llandogo, Llanellen, Llanfaenor, Llanfihangel Rogiet, Llangattock Lingoed, Llangwm, Llangwm-isaf, Llangybi, Llanishen, Llanllywel, Llanover, Llansabbath, Llansoy, Llanthony, Llantilio Pertholey, Llantrisant, Llanvaches, Llanvair Discoed, Llanvetherine, Llanvihangel Crucorney, Llanwenarth, Magor, Mathern, Mitchel Troy, Monkswood, Monmouth, New Castle, Newport, Oldcastle, Pandy, Penallt, Penpergwm, Penrhos, Penyclawdd, Portskewett, Raglan, Rockfield, Saint Arvans, Saint Maughans, Shirenewton, Skenfrith, Tintern, Tredunnock, Trelleck, Undy, Usk, Wolvesnewton, Wonastow

Travertine Tiled Bathroom Floor Renovation Magor Newport

Renovating Travertine Bathroom Floor Tiles in Magor Newport

These travertine tiles were laid twelve years ago in the bathroom of a property in the village of Magor near Newport. They were supplied by Mandarin Stone however the tiler had not sealed or grouted them correctly during installation.

Travertine Tiled Bathroom Before Renovation Magor Newport

The client highlighted a significant crack running along 4 of the tiles starting at the bottom of the toilet and was unsure what to do about it. I suspect this was due to movement in the floor and wondered if a backer board had been used under the floor as this would usually prevent this.

The patterns you find in natural stone are unique so finding a replacement Travertine tile to match the cracked tiles was unlikely. I therefore suggested disguising the crack with a coloured filler as part of an overall renovation. They also asked me if I could regrout the entire floor as most grout lines were quite deep and below the surface edge of the tile, also the natural pits in the stone were collecting a large amount of dirt from foot traffic.

Travertine Tiled Bathroom Before Renovation Magor Newport Travertine Tiled Bathroom Before Renovation Magor Newport

Happy to oblige I worked out a quote to resolve all the problems which was accepted, and a date set to do the work.

Cleaning a Travertine Tiled Bathroom

I began by removing as much of the existing grout as possible with a grout rake, this is slow work as you must be very careful not to chip the adjacent tiles in the process. Once complete I started on cleaning the tiles using a medium dilution of Tile Doctor Pro-Clean which was left to soak in for 15 minutes. This dwell time gives the product chance to breakdown the dirt and other contaminates before being scrubbed into each tile using a handheld brush making sure every nook and cranny was sufficiently clean. The floor was then rinsed with a sponge and brush ensuring there was no product residue left within the tiles or pits.

Once the tiles had fully dried the floor was grouted using flexible grout in a colour that closely matched the grout used on the wall tiles. Grout was also run along the crack to disguise it as much as possible. Once the entire floor had been regrouted properly, I left to allow it to go off overnight and allow the tiles to dry out further.

Sealing a Travertine Tiled Bathroom

Previously I had discussed the range of Tile Doctor sealing products with the client and what they would provide in terms of finish. It was clear they wanted to keep the look of the stone as light as possible whilst sealing so with this in mind I opted to seal the Travertine with Ultra-Seal which is a clear coat sealer that provides maximum protection without enhancing or darkening the stone.

Four coats of Ultra-Seal were applied making sure to cover all pits in the tiles and the new grout that had been installed. This sealer works by occupying the natural pores in the stone, ensuring dirt remains on the surface where it can be easily cleaned away.

Travertine Tiled Bathroom After Renovation Magor Newport

Once complete I’m happy to report my client was really pleased with the result, they were worried that whole floor would have to be ripped out and replaced so much relieved to have found a better solution. I guess we really lived up to our Tile Doctor name on this occasion.

On the subject of aftercare, I left the client with a bottle of Tile Dr PH Neutral Tile Cleaner which is a gentle yet effective tile and grout cleaner that won’t harm the new sealer.


Professional Renovation of a Travertine Tiled Bathroom in Monmouthshire

Renovating Travertine Bathroom Floor Tiles in Magor Newport Read More »

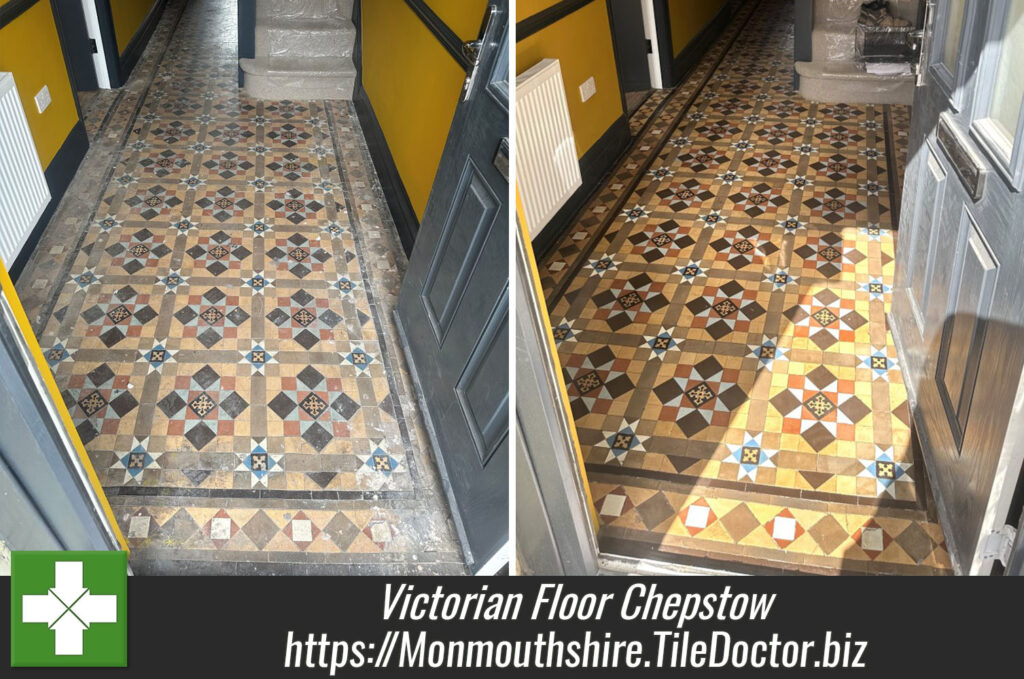
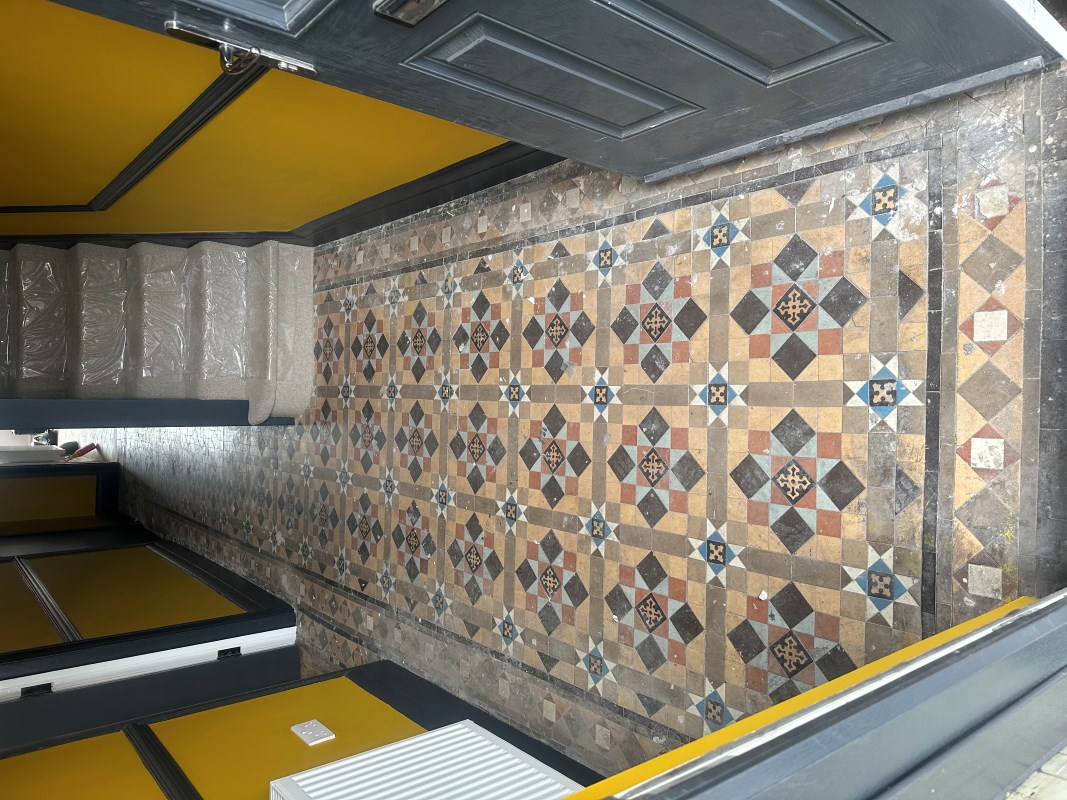
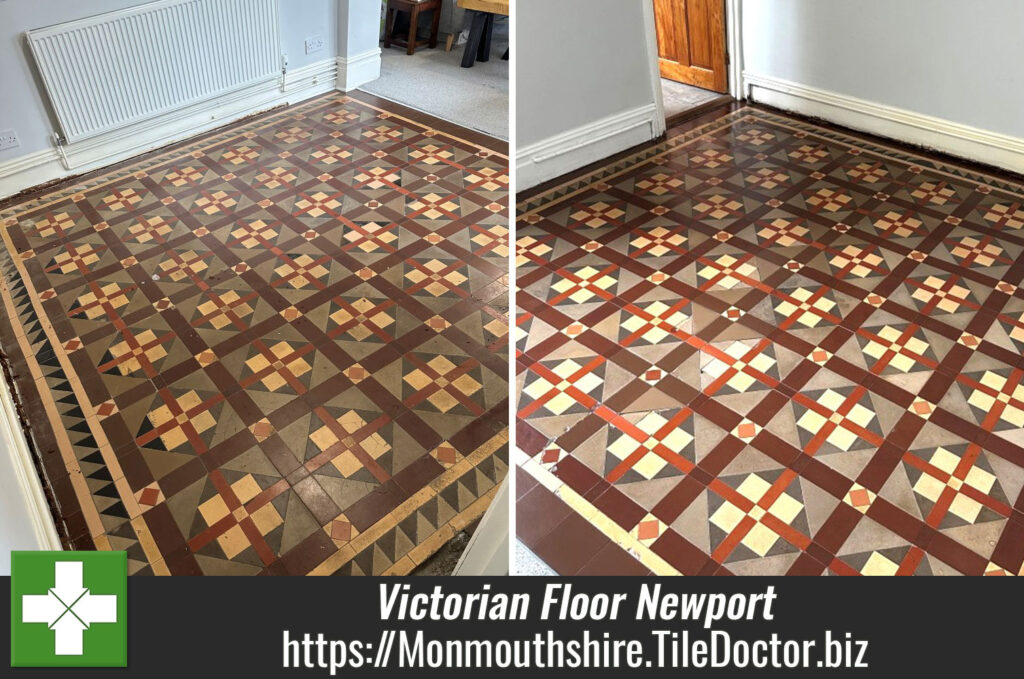
Victorian Tiled Dining Room Floor Restoration Newport

Repair and Renovation of a Victorian Tiled Dining Room Floor in Newport

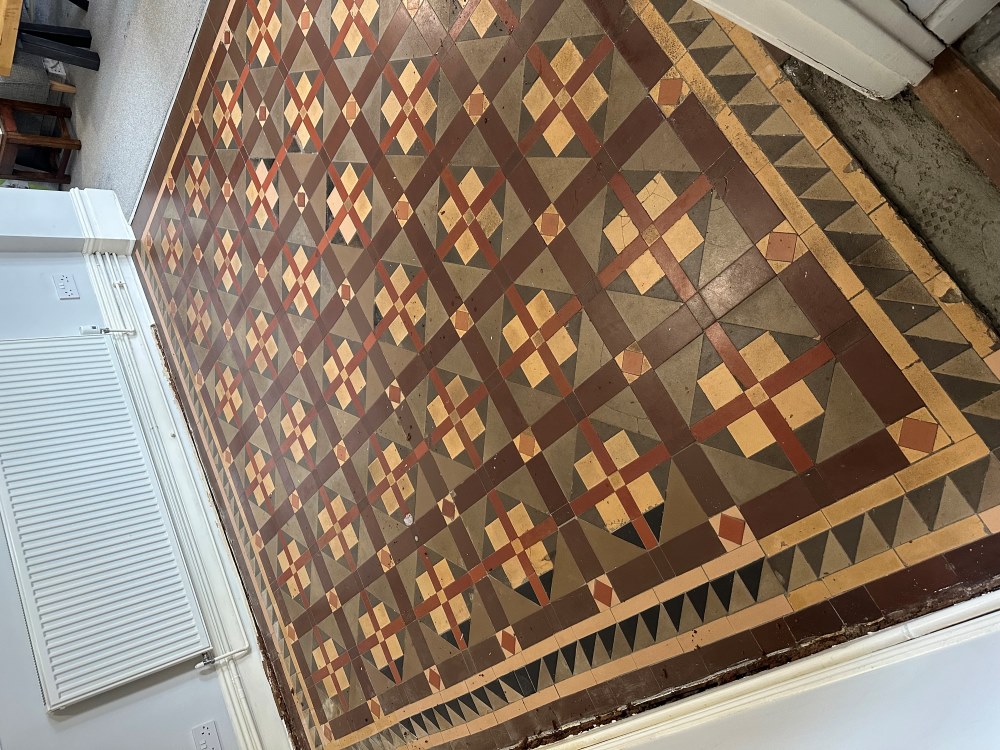
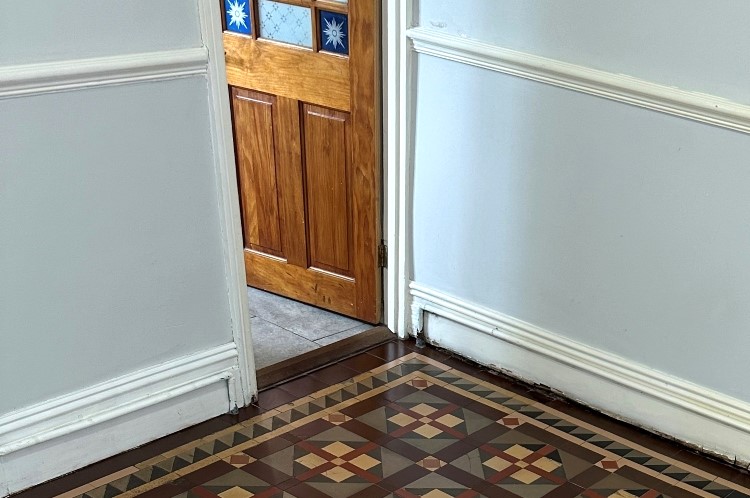
The client had lived at this property in Newport for a few years and decided that it was finally time to sort out the Victorian tiled floor in the dining room. Some repairs were needed in a few areas and the sealer was fading and due for replacement.

Victorian Tiled Dining Room Floor Before Renovation Newport

I went over to the property to survey the floor and advised that with repairs, cleaning and sealing the process would take two and a half days. Having worked on many many floors like these before I was very confident that we could repair the floor where needed and restore its appearance.

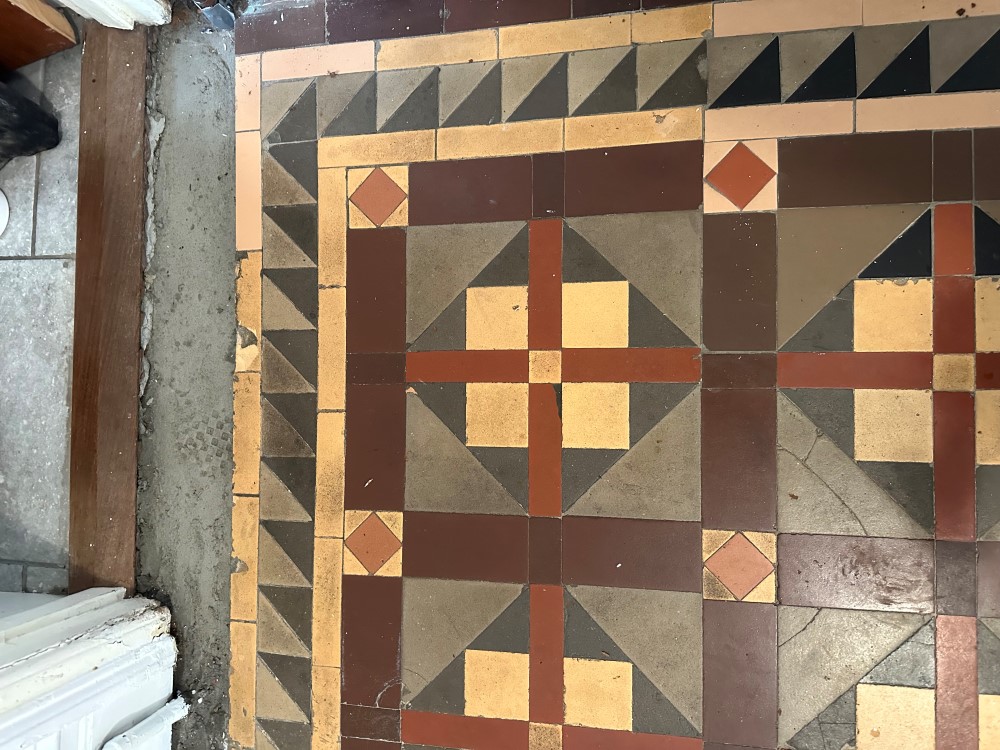
During the visit I noticed that at the door threshold leading into the kitchen, some of the tiles had been taken up for a gas pipe repair and back filled with cement, I suggested I could repair this section using matching tiles, so I included it in the quote. The quote to renovate and repair the floor was accepted and the job was booked in.

Victorian Tiled Dining Room Floor Before Renovation Newport

Cleaning and Repairing a Victorian Tiled Dining Room Floor

I began by addressing the tiling issues so my first course of action was to set matching tiles along the doorway border leading to the kitchen, as the previous tiles had already been removed by the gas company it was fairly straight forward job of carefully knocking out the cement. The tiles I had sourced were from a nearby reclamation yard and needed to be carefully cut to size to ensure a good fit with the original. After setting the tiles and grouting I left them to dry overnight.

The following day I began cleaning, using a combination of Tile Doctor Remove and Go and Pro-Clean, leaving the solution to dwell after being brushed into the floor. After around ten minutes the floor was scrubbed by hand with a stiff brush to release the dirt from the tiles. The resultant slurry was then vacuum away and with the floor cleaner I was able to get a better idea of which areas needed more attention.

I restored the perimeter of the floor with a 200-grit diamond block and this was followed up with a 200-grit diamond pad fitted to a rotary machine. These coarse pads cut into the tile surface removing years of grime and giving them a new lease of life. After another rinse and extraction with the wet vacuum the whole floor had a much brighter appearance. The process was then repeated with a 400-grit diamond pad to close the pores of the tiles.

The floor was then washed by hand with water and a sponge to make sure there wasn’t any areas missed, also to ensure there was no residue from the cleaning products left on the floor which could potentially disrupt the sealing process. The floor was then left to dry overnight ready for sealing the following day.

Sealing a Victorian Tiled Dining Room

To assist with drying I asked the client to leave a couple of air movers running during the evening and to put them back on in the morning. This worked well and by the next day I was able to confirm the floor was dry and ready for sealing with a moisture meter.

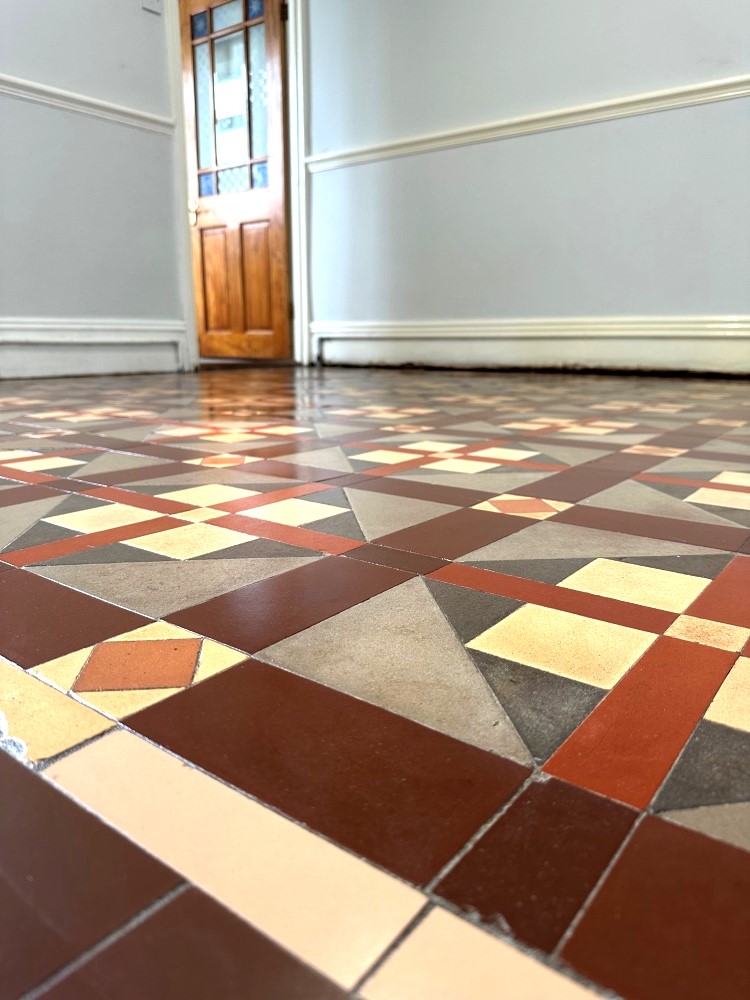
The client had requested a satin finish and so the sealer chosen was Tile Doctor Seal and Go, four coats were applied to the tiles a permanent wet look and gorgeous lustre. Another advantage of Seal and Go is that it’s a water-based sealer so it doesn’t give off a smell as it dries.

Victorian Tiled Dining Room Floor After Renovation Newport

For aftercare I left the client a bottle of Tile Doctor pH Neutral Tile Cleaner to help maintain the appearance of the floor. This is a gentle tile cleaning product that won’t harm the sealer, many of the products you find in supermarkets are simply too strong for a sealed floor.

Victorian Tiled Dining Room Floor After Renovation Newport


Professional Restoration of a Victorian Tiled Floor in Monmouthshire

Repair and Renovation of a Victorian Tiled Dining Room Floor in Newport Read More »

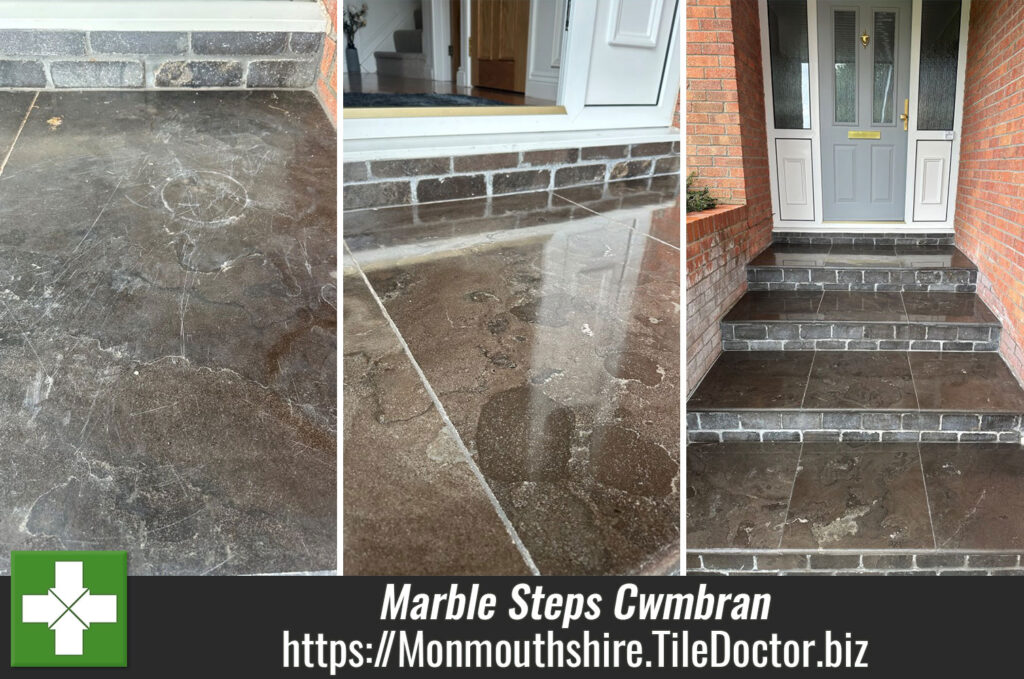
Marble Tiled Step Polishing and Renovation Cwmbran

Restoring the Polish on Marble Tiled Steps in Cwmbran

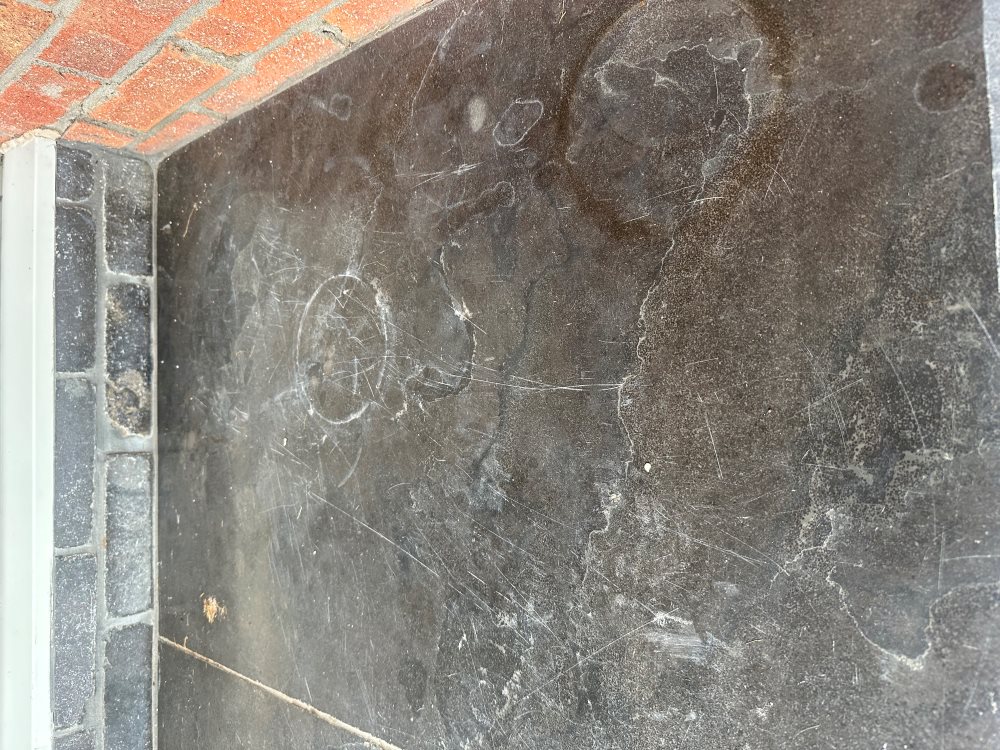
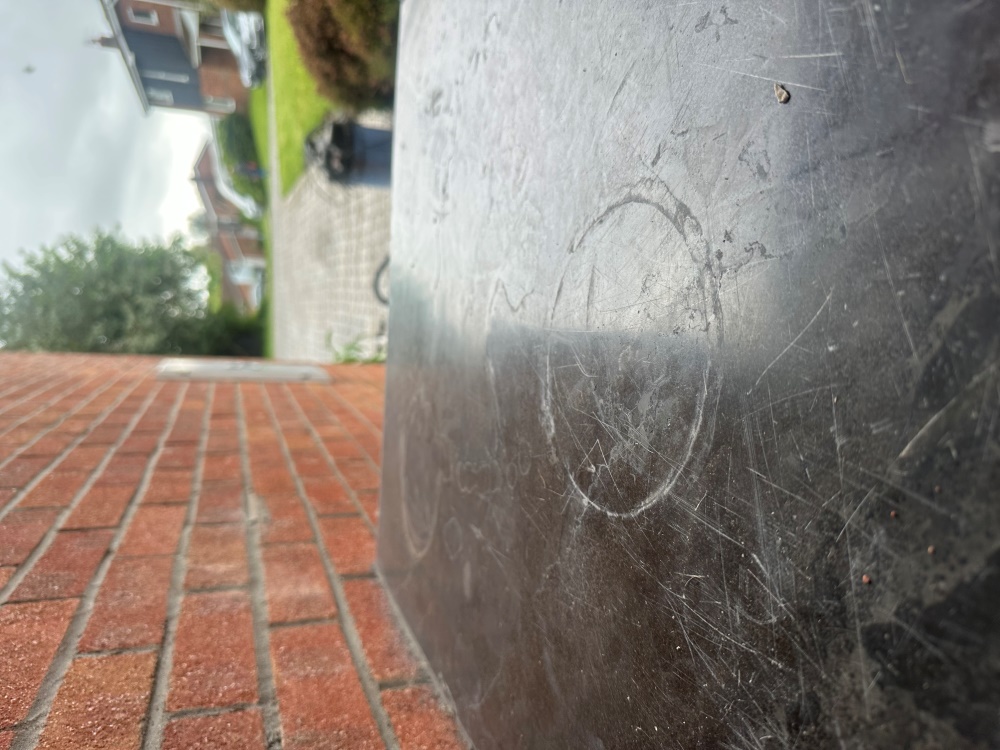
The marble steps shown in the images were installed at a property in Cwmbran roughly ten years ago. Supplied by Mandarin Stone the Marble was beautiful however over time they had lost their polish. Also, the plant pots that had been placed on either side of the steps had scratched the pieces of marble quite deeply in some areas.

Marble Steps Before Polishing Cwmbran Marble Steps Before Polishing Cwmbran

I explained to the client what would need to be done to restore the appearance of the steps and the materials required. They had previously been told there was no possible way of removing the scratches caused by the plant pots so they were delighted to have found a solution.

Having agreed my quote a date was set for the work to start.

Cleaning Marble Tiled Steps

To remove the scratches and restore the polish applied a set of Tile Doctor Burnishing Pads, starting with a coarse 50-grit pad attached to a rotary machine. The pads area applied with water and the slurry generated rinsed off and extracted afterwards. The 50-grit was followed by 100, 200, 400, 800, and finishing on 1500 grit, again all applied with water and rinsed off after each pad.

For the corners that the machine could not reach I used a similar set of 6” burnishing pads attached to a hand-held rotary machine. The pads were applied in the same order starting with a 50 grit and finishing on 1500 grit. Again, after each pad the slurry was extracted with a wet vacuum and the steps washed with water.

Once I had reached 1500 grit, the steps were allowed to dry, and I was able to demonstrate that the scratches had been removed and the natural polish restored. They were still worried that I wouldn’t be able to remove the scratches so were delighted to see they were now gone! I then began the final step of polishing the Marble steps by spray burnishing them with a 3000 grit Tile Doctor Burnishing Pad which is the last step in the polishing process.

Sealing Marble Tiled Steps

My client was very fond of the steps when they were wet as the colour was “significantly enhanced“ so I suggested I we use Tile Doctor Colour Grow to create a similar effect. The sealer is fully breathable, with a colour enhancing matt finish which is perfect for exterior use and for slightly darkening natural stones.

Four coats of sealer were applied allowing each coat to dry for thirty minutes before applying the next. When Marble is polished to a high shine every mark becomes obvious so once the final coat was dry the steps were then buffed with a White buffing pad.

Marble Steps After Polishing & Sealing Cwmbran

My clients were extremely happy with the job and asked me to return later to renovate the tiles in both their ensuite bathrooms.

Marble Steps After Polishing & Sealing Cwmbran

To maintain the sealer and to prevent accelerated break down I left the client with a bottle of Tile Doctor Stone Soap which is a gentle but effective stone cleaner that helps maintain the patina.


Professional Restoration of Marble Tiled Steps in Monmouthshire

Restoring the Polish on Marble Tiled Steps in Cwmbran Read More »

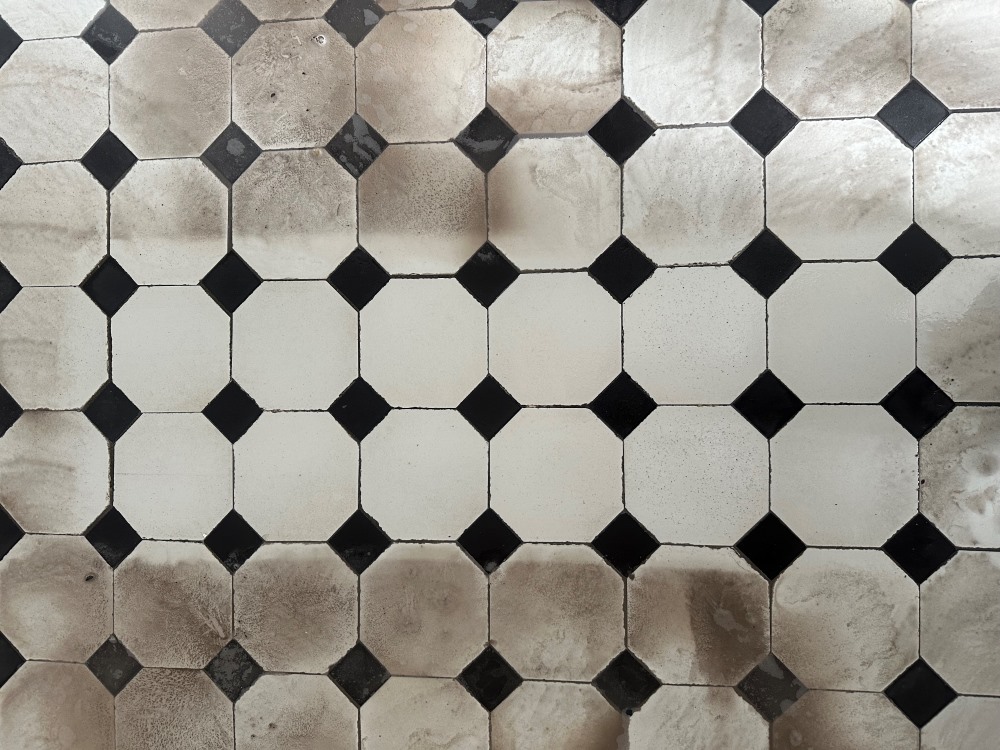
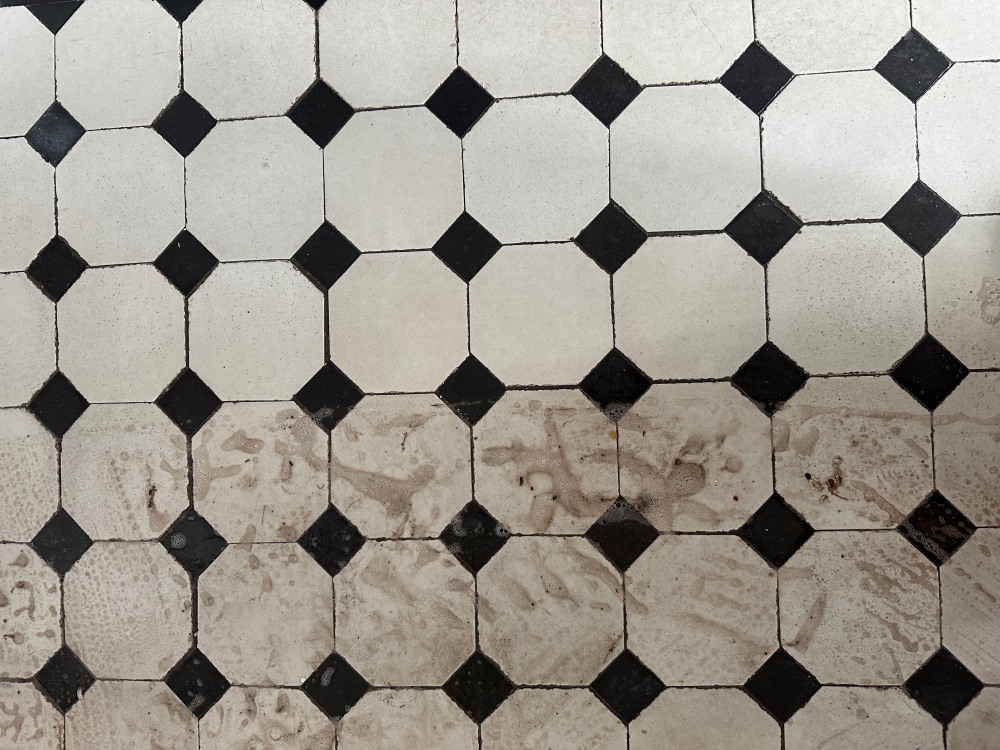
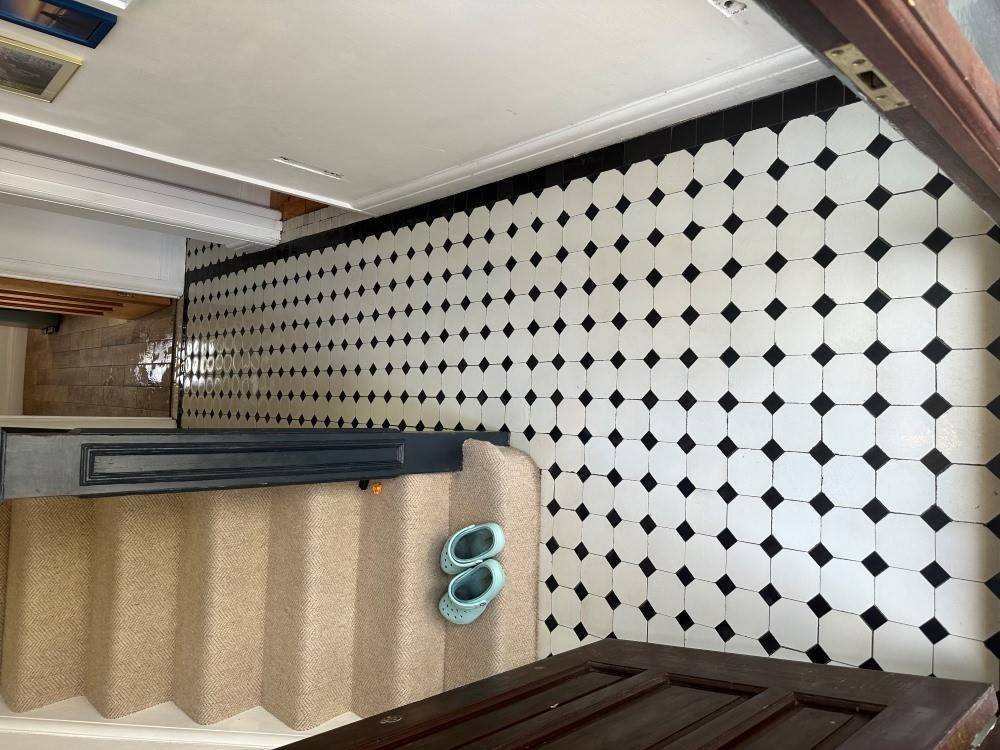
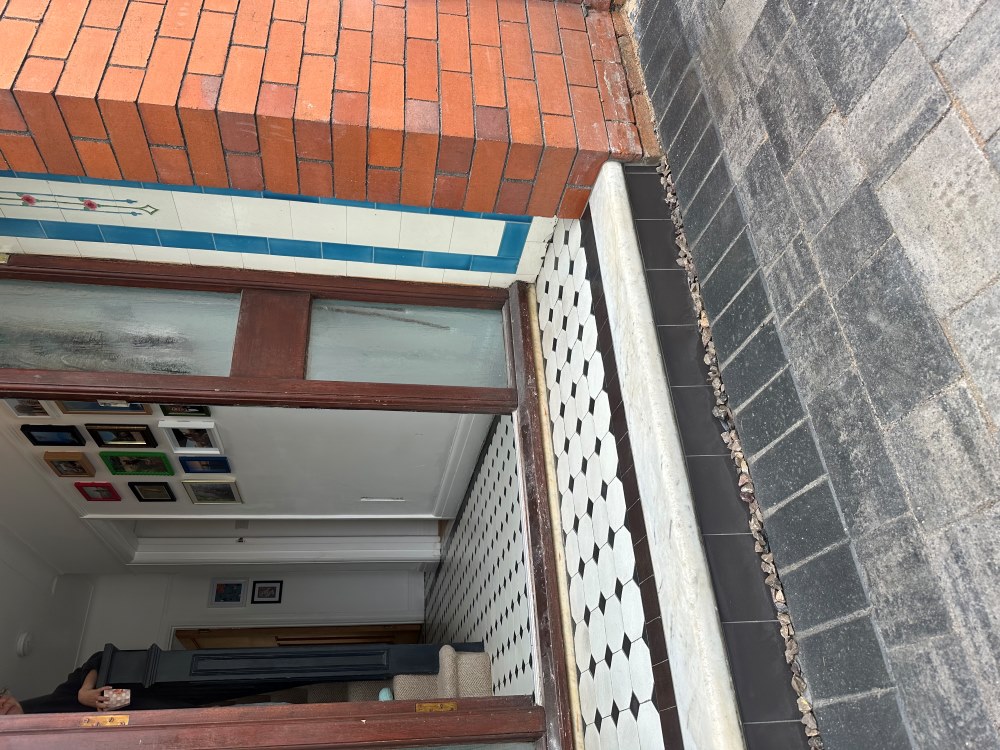
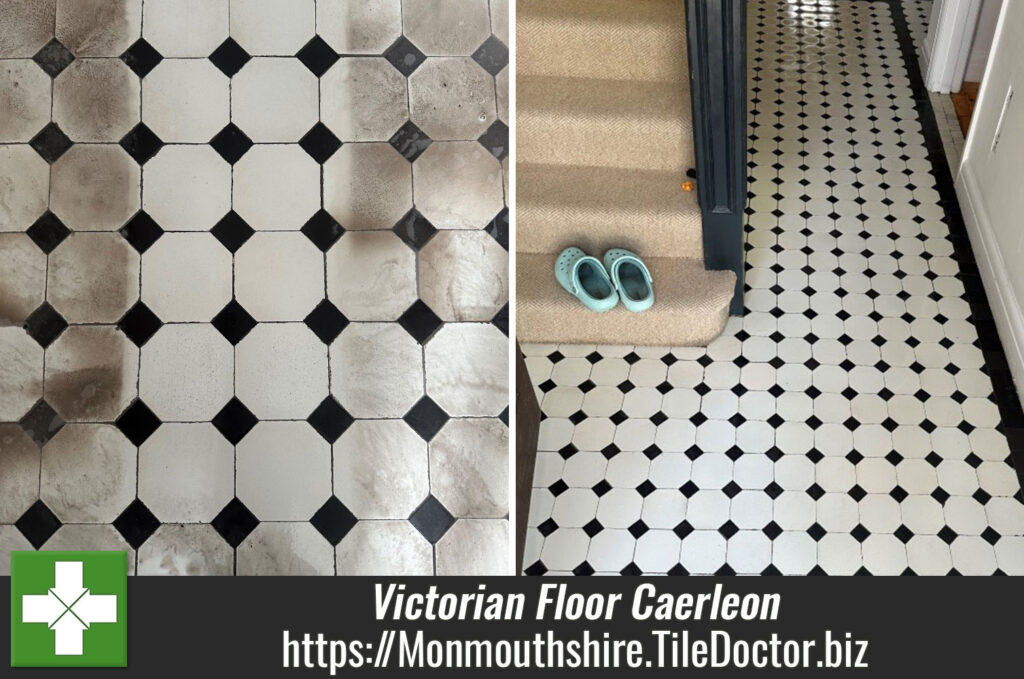
Classic Black and White Victorian Tiled Hallway Renovated in Caerleon

Classic Black and White Victorian Tiled Hallway Caerleon

A customer in Caerleon on the outskirts of Newport asked me to call in to discuss their classic Black and White Victorian tiled hallway floor. The had told me that their floor wasn’t that dirty and just needed a light clean and seal.

I conducted a moisture reading upon surveying with showed the floor was high in moisture in some areas, this information is important as it shows the need to use a fully breathable sealer that will allow moisture to rise through the tile and evaporate at the surface. If we were to use a less breathable product moisture could build up under the tiles where it will reach out to the walls resulting in rising damp.

Classic Black and White Victorian Tiled Hallway During Cleaning Caerleon

After conducting a cleaning test on part of the floor, it was evident there was a substantial amount of dirt being held by the tiles. My customer was gobsmacked by this as they clean the floor twice a week minimum. This test proved that the sealer was failing on the floor and dirt was being trapped in the pores of the tile where it is difficult to shift with normal cleaning.

Impressed with the amount of dirt I was able to pull out of the tiles I was asked to schedule a date to return and deep clean then seal the whole floor.

Cleaning a Black Slate Tiled Kitchen Floor

I began cleaning by applying a mixture of Tile Doctor HBU Nanotech Remover combined with Pro-Clean and left it to soak in for a good ten minutes. This gives it time to work and breakdown the ingrained dirt from foot traffic and any remnants of old sealer. The solution was then agitated and scrubbed with a Silicone Carbide Brush attached to a rotary machine. This action lifted the soiling from the tiles to the surface where it was extracted with a wet vacuum.

Classic Black and White Victorian Tiled Hallway During Cleaning Caerleon

The brush can struggle to get into the corners to these were hand-cleaned using a 200-grit diamond block and more solution. Once I was satisfied the floor was clean, I moved onto the final phase of deep cleaning. For this I applied a 200-grit burnishing pad lubricated with water followed by a 400-grit burnishing pad. The slurry generated from this process was then sucked up with a wet vacuum.

I then washed the floor with a sponge and water ensuring nothing had been missed then left it to dry for a couple of days leaving the customer with an air mover to speed up the drying.

Sealing a Black Slate Tiled Kitchen Floor

Once I returned and conducted a moisture reading, the results were good and showed the floor had returned to its previous level and was now ready for sealing. As mentioned previously I would need to use a fully breathable sealer for this work which does limit the options slightly. Having discussed this with the owner previously we agreed to use a Matt sealer called Tile Doctor Colour Grow. This is a fully breathable colour enhancing Matt finish sealer that improves colour and helps the Black and White tiles stand out.

Two coats of Colour Grow were applied allowing thirty minutes between coats. This is an impregnating sealer that soaks into the tile occupying the pores and thereby ensuring dirt can no longer reside there. This ensures dirt or spillages remain on the surface where they can easily be cleaned away. Once dry I used a White buffing pad on my rotary machine to buff the floor ensuring a uniform matt finish.

Classic Black and White Victorian Tiled Hallway During Cleaning Caerleon

The customer was ecstatic with the results as you can see by the images, a lot of dirt was removed. To maintain the sealer used on the floor I left the customers with a bottle of PH Neutral Tile Cleaner. You do need to be careful when choosing a floor cleaning product as most are simply too strong for use on sealed tiles and will strip off a sealer with repeated use.

Classic Black and White Victorian Tiled Hallway During Cleaning Caerleon


Professional Cleaning of a Classic Victorian Tiled Hallway Floor in Monmouthshire

Classic Black and White Victorian Tiled Hallway Caerleon Read More »

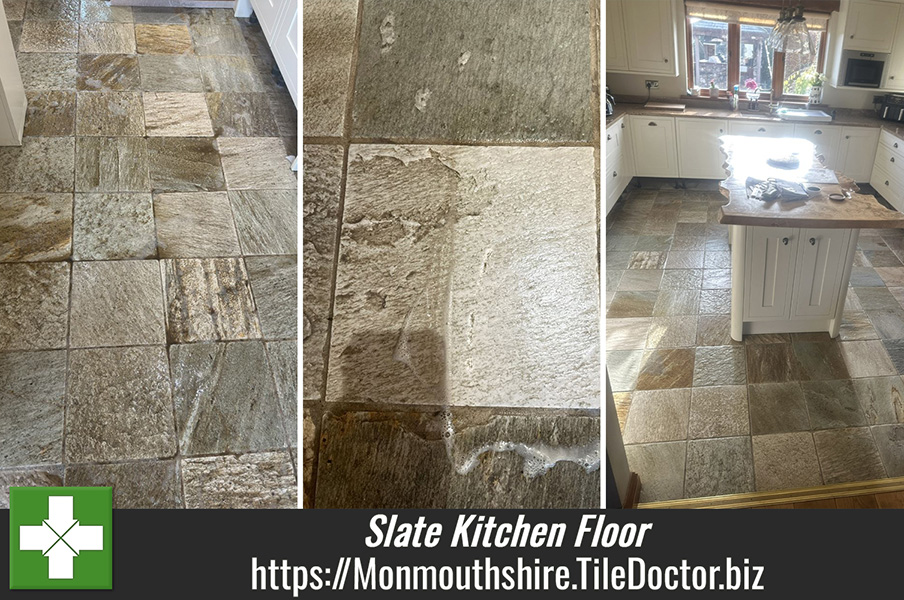
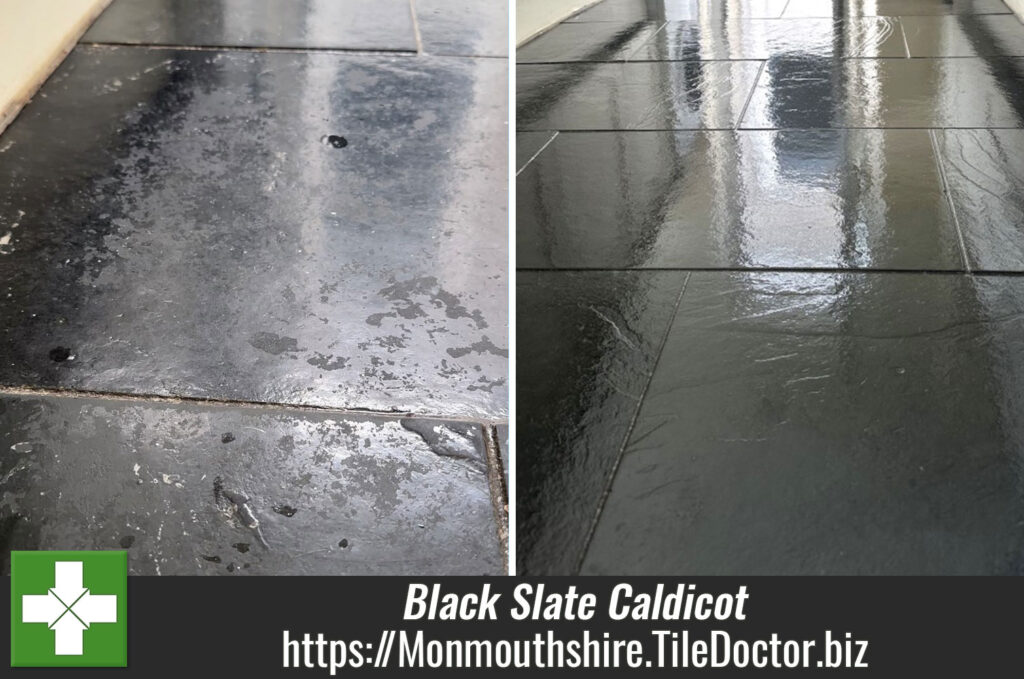
Black Slate Tiled Kitchen Floor Renovation Caldicot

Black Slate Tiled Kitchen Floor Renovated in Caldicot

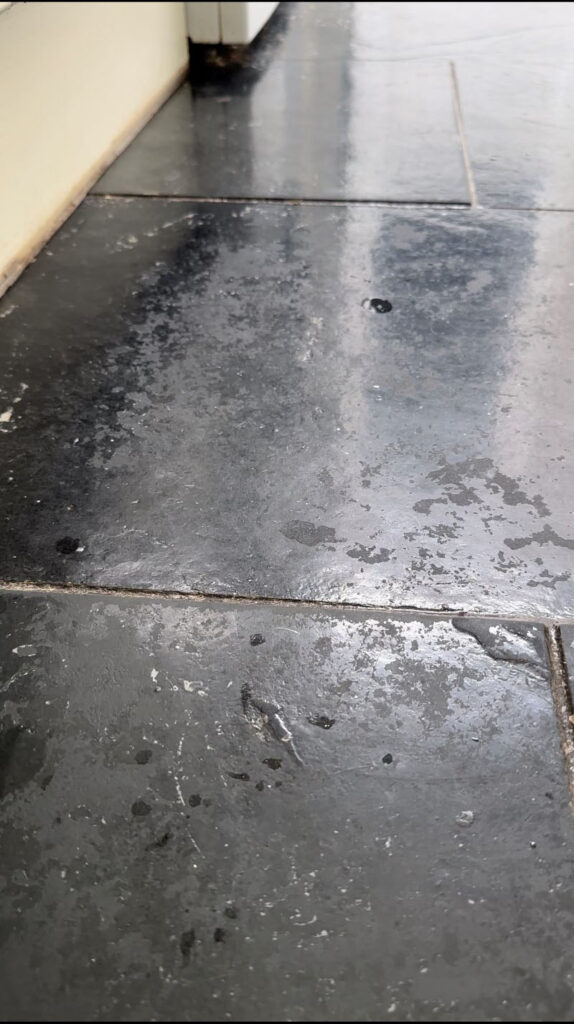
I recently cleaned and sealed this small Black Slate tiled kitchen floor in the market town of Caldicot. You can see from the before image below that the sealer that was applied when the floor was installed twelve years ago had completely failed and had begun to flake away. Kitchen floors and especially small floors like this one do get a lot of foot traffic resulting in wear to the sealer, they are also subject to staining from cooking.

Slate Tiled Kitchen Floor Before Cleaning Caldicot

To restore the Slate back to its original appearance what was left of the old sealer would need to be stripped back entirely, then the tiles would need deep cleaning and resealing. In this case the customer wanted to keep the permanent wet look finish however I had a sealer in mind that would provide this.

I discussed with the client the process to get the floor cleaned and restored and created a quote for doing the work which would only take a day. Happy with the quote a date was set for the work to start.

Cleaning a Black Slate Tiled Kitchen Floor

After protecting the kitchen unit plinths from splashing I started by brushing diluted Tile Doctor Pro-Clean onto each tile and left it to dwell for fifteen minutes. This gives the product time to breakdown and lift the remnants of the remaining sealer. The solution was then agitated with a seventeen-inch 120-grit poly brush that attaches to a rotary floor machine along with more water to help lubricate the process.

Fortunately, being a small floor with large format Slate tiles there wasn’t much grout so it didn’t take too long to get the grout clean with more Pro-Clean scrubbed in by hand with a scrubbing brush.

The scrubbing turns the cleaning solution black with the dirt and old sealer released from the tile which was then vacuumed up. I noticed however that not all the sealer had been removed so I repeated this process once again until I was satisfied.

After drying the floor completely using an air mover it was evident that all the previous sealer had been removed and the floor was now ready to be sealed

Sealing a Black Slate Tiled Kitchen Floor

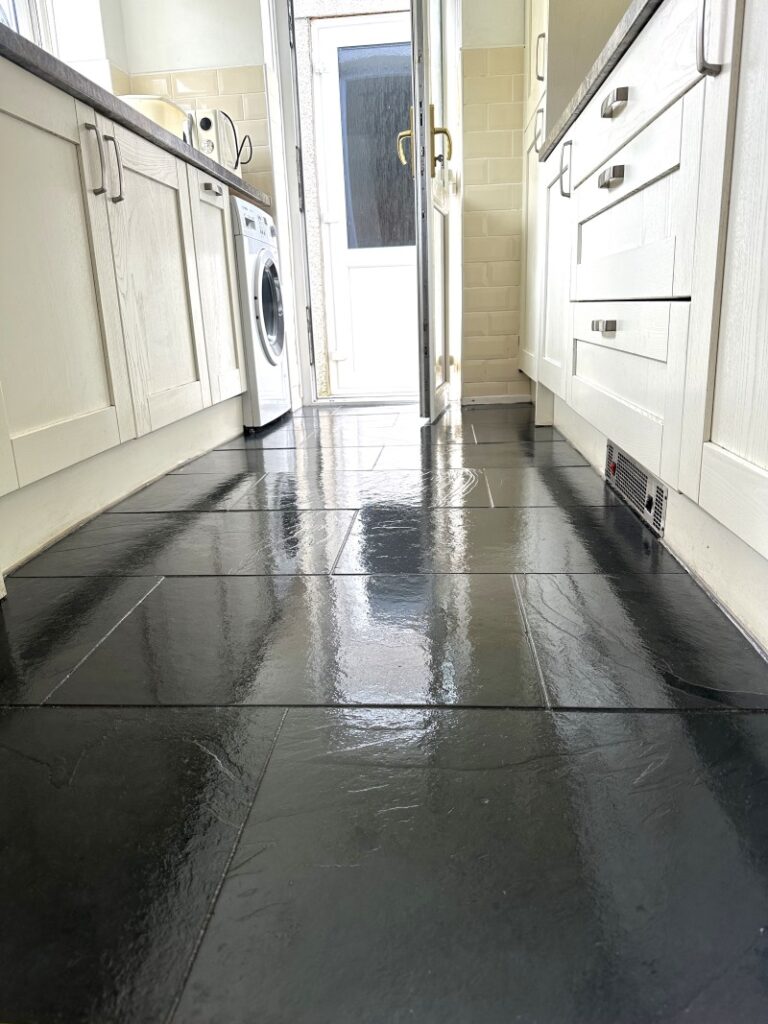
The customer had requested a high satin finish, the same as it looked after it was first laid. To achieve this, I applied Tile Doctor Seal and Go, applying four even coats which left the floor glistening.

The new sealer will ensure dirt cannot find its way into the pores of stone and remains on the surface where it can easily be cleaned away by the client. This allows the customer to easily maintain the cleanliness of the floor.

Slate Tiled Kitchen Floor After Cleaning Sealing Caldicot

My customer was delighted with the results and said that it even looked better than when it was installed over 12 years ago! For aftercare I left the customer with a bottle of Tile Doctor PH Neutral Tile Cleaner which will help maintain the appearance of the floor. You do need to be careful when choosing a floor cleaning product as most are simply too strong for use on sealed tiles and will strip off a sealer with repeated use.


Professional Restoration of a Black Slate Tiled Kitchen Floor in Monmouthshire

Black Slate Tiled Kitchen Floor Renovated in Caldicot Read More »

Green Riven Slate Floor Cleaning and Sealing Chepstow

Green Riven Slate Floor Cleaned and Sealed in Chepstow

This client in Chepstow had a beautiful Green Riven Slate Tiled floor installed in their living room some year prior but were now unhappy with its appearance. What was once a real feature of the property had lost its deep shine and now looked flat and unappealing.

The client called us in to see what could be done to put the life back in the stone and so I went over to survey the floor and come up with a renovation plan. The owner explained that the floor was sealed with a satin finish sealer and although they liked the way that looked it had deteriorated over time and now the floor looked patchy.

Green Riven Slate Floor Before Cleaning Chepstow

This is a common problem with sealed stone floors, sealers do wear off in the busiest parts of the floor and once this happens, they will lose their appearance as dirt gets trapped in the pores of the stone where its difficult to flush out with regular cleaning. The other problem we see is the use of harsh unsuitable cleaning products which can reduce the life of the sealer.

To resolve I recommended stripping off all the old sealer back to the natural stone, deep cleaning the pores and then re-sealing with a product that would give them the satin finish they had before. Happy with my proposal and quote a date was agreed for the work to start which would take two days, one to strip and clean and the other to seal.

Cleaning a Green Riven Slate Tiled Floor

Work started by stripping off the old sealer with a strong dilution of Tile Doctor Pro-Clean which was brushed over the tile and grout, and then left to soak in for ten minutes. This dwell time gives the product time to start breaking down the old sealer and dirt. The solution was then agitated with a poly brush fitted to a large buffer machine which was run over each tile several times. This process released the remaining sealer and dirt from the stone resulting in lots of soiling which was rinsed off with water and extracted with a wet vacuum.

The tile and grout were then inspected and spot treated with a hand scrubbing brush where needed. This is especially useful to get right into the grout and tight corners where a machine will struggle. This was then followed by more rinsing and extracting to remove the resultant soiling and neutralising the entire floor to remove all trace of cleaning products prior to sealing.

The floor was then left to dry off overnight.

Sealing a Green Riven Slate Tiled Floor

The next day I returned to the property and checked several sections of the floor with a damp meter to ensure the Slate had dried off and was ready to be sealed. Sealing a damp floor is never a good idea as it can affect the sealer curing and result in a patchy appearance.

Green Riven Slate Floor During Sealing Chepstow

To seal the floor four coats of Tile Doctor Seal and Go were applied which is a water-based sealer that has the advantage of not leaving a smell as it dries. This produced the appealing satin finish they were after and brought out the best in the stone as you will see in the photos. The sealer will protect the stone from everyday use and can last up to five years if maintained correctly.

Green Riven Slate Floor After Cleaning Sealing Chepstow

After the job was completed, the Green Slate looked fantastic and my customer was beyond happy. I took time to explain how to clean the floor and recommended they use of Tile Doctor Neutral Tile Cleaner. This is pH neutral product that is effective yet won’t impact the newly applied sealer.

Green Riven Slate Floor After Cleaning Sealing Chepstow


Professional Cleaning of a Green Black Slate Tiled in South Cumbria

Green Riven Slate Floor Cleaned and Sealed in Chepstow Read More »

Parquet Covered Marble Floor Restoration Monmouth

Marble Tiles Hidden under Parquet Flooring Restored in Monmouth

We discovered these Black and White Marble tiles under Parquet flooring at an 1890’s mansion house near Monmouth. The property had been converted into flats in the 1980’s and originally there was polished black and white marble throughout the entire ground floor however over the years, maintenance had been carried out resulting in parts of the floor having to be ripped up and filled with concrete.

Our customer had recently purchased the flat on the ground floor and were hoping to move in within the next couple months following renovation work. We were asked to remove the wooden parquet, restore the Marble floor, and lay 50sq m of tiles in their dining area.

During our survey we noticed there were several small areas in the bedroom where the Marble tiles had been taken up and backfilled with concrete so after discussing this with the owner, we agreed to replace this floor with matching Black and White Marble tiles from a reclamation yard.

Parquet Covered Marble Floor Before Restoration Monmouth Parquet Covered Marble Floor During Restoration Monmouth

With the scope of the work and our quote agreed a date was set for the work to begin and in the meantime, we started looking for Marble tiles in local reclamation yards.

Restoring Parquet Covered Marble Flooring

The first job was to prepare all the floors for cleaning which in this case involved completing the removal of the Parquet flooring and concrete backfill that had been used in some areas. This was a large enough job on its own but the most difficult part was to clean all the bitumen and adhesive that had been used to secure it in place.

The main challenger we faced on these two floors were breaking up and removing the areas where concrete had been filled in without disturbing neighbouring tiles as they are expensive to replace. With the floor clear of rubble, the replacement matching Marble tiles were laid to the original pattern and grouted in.

Parquet Covered Marble Floor During Restoration Monmouth

The bitumen adhesive issue was tackled initially using a dry scrape of the tiles to remove as much of the gluey substance as possible. Once done there was a vast improvement on our visibility of the tiles and condition of the floor and this revealed that every White tile in the hallway had been painted Red at some point in its long history. We hadn’t anticipated this problem however our next step was to further clean up the tiles using Tile Doctor Remove and Go which is a coatings remover and should help.

The Remove and Go was applied neat for maximum impact and left to soak in for ten to twenty minutes before being scrubbed in. The dwell time gives the product time to breakdown the coatings, softening them and thereby making them easier to remove. The method worked and we were able to scrape off all the glue and red paint which it turned out had been applied to the whole floor and not just the White tiles.

Parquet Covered Marble Floor During Restoration Monmouth

Once done both Marble floors were inspected and it was clear they were still substantially soiled with dirt and further cleaning would be required. To this a strong dilution of Tile Doctor Pro-Clean was applied to both floors, left to soak in as before and then scrubbed with a course deck brush to release the dirt. The soiling was then removed using a wet vacuum and the floor given a further inspection. This removed 95% of the dirt but we were not 100% satisfied so the whole process was repeated.

Parquet Covered Marble Floor During Restoration Monmouth Parquet Covered Marble Floor During Restoration Monmouth

Polishing Restored Marble Tiled Flooring

Our final step in restoring the appearance of the original Marble tiles was to restore the polished appearance of the stone using a series of burnishing pads of different grits. This process began with a very coarse 100 grit pad which really cuts into the stone removing a thin layer of stone from the surface.

This 100-grit pad was followed by 200, 400, 800 and 1500-grit burnishing pads, water is used to provide lubrication and the floor is rinsed and soiling extracted using the wet vacuum after each pad. This process slowly rebuilds the appearance and polish on the Marble. The polishing process is finished the application of a very fine 3000-grit burnishing pad which is applied dry with only a little water sprayed onto the Marble tile.

Sealing a Marble Tiled Entrance Hall Floor

We Left the floor for 24 hours to fully dry out and returned on the last day to protect the Marble with a sealer. The customer specified they wanted a durable satin, wet look finish but so we suggested using Tile Doctor Seal and Go.

Parquet Covered Marble Floor After Restoration Monmouth Parquet Covered Marble Floor After Restoration Monmouth

This product is a water-based sealer that gives the desired effect and make it easy to keep clean, additionally being water based it doesn’t leave a smell as it dries. Several coats were applied and once done the customer was thrilled.

For aftercare cleaning I recommended they use Stone Soap as its designed for the regular cleaning of sealed and polished stone, as well as cleaning it also helps build the patina.


Professional Restoration of a Mable Tiled Hallway in Monmouthshire

Marble Tiles Hidden under Parquet Flooring Restored in Monmouth Read More »
Victorian Tiled Hallway Floor Before After Restoration Cwmbran

Restoring a Neglected Victorian Tiled Hallway in Cwmbran

I recently worked on the restoration of a Victorian tiled hallway in Cwmbran Wales which is six miles North of Newport. As you can see from the photographs the floor was in quite a neglected dirty state and many of the the black and white border tiles needed removing and replacing. The worst part was the area by the front door where most of the tiles had been removed and then backfilled with concrete. I can only assume at some point in the past it was deemed to difficult or expensive to restore the floor, so they simply covered it up.

Victorian Tiled Hallway Entrance Before Renovation Cwmbran Wales

After visiting to survey the floor I did offer to source replacements for the concreted section and restore that as part of the work however my client’s budget would not stretch to that at the time. My quote was therefore focused on the main section of flooring and included replacing border tiles, deep cleaning the whole floor and then sealing the tiles to add protection. Although I did need to check that I could indeed source the replacement tiles before being able to provide the quote which as it turned out would not be an issue.

Victorian Tiled Hallway Before Renovation Cwmbran Wales Victorian Tiled Hallway Before Renovation Cwmbran Wales

They were happy to go ahead and we arranged a suitable time to carry out the work which would enable me to work in the property whilst minimising contact with the owners due to the Covid-19 situation.

Cleaning/Repairing a Victorian Tiled Hallway Floor

I spend the first day sorting out the black and white border tiles which needed to be gently prised out of position without upsetting the main part of the floor. The exposed subfloor was then cleaned up to remove old adhesive and replacements were fitted where required and secured into place. The floor would need to be solid before cleaning so that was left for day two so the new adhesive could go off overnight.

On day two I gave the floor an initial clean using a combination of Tile Doctor Pro-Clean and Remove and Go diluted with water. This produces a strong cleaner/stripper that will tackle dirt and remove coatings such as previous sealers. The old tiles had accumulated years of ingrained dirt, so I needed this extra power to remove the years of dirt and contaminates from the tile. It was sprayed onto the tiles and then left to soak in for ten minutes before being actively scrubbed into the tile using a rotary machine fitted with a black scrubbing pad. The soil was then rinsed off with water and extracted with a wet vacuum. The floor was inspected, and the process repeated on the tough stains until I was satisfied all the dirt had been removed.

Next the floor was treated to an acid wash using Tile Doctor Acid Gel using a similar method as before. This is an important treatment for these old Victorian floors that have no damp proof course as it neutralises efflorescent salts trapped in the tile which can appear as white salt deposits later. Once I was happy with the condition of the floor it was given a final rinse and left to dry off. I use a wet vacuum to remove liquids from the floor and on this last extraction I spent extra time to remove as much moisture from the tiles as possible.

Sealing a Victorian Tiled Hallway Floor

I came back a few days later and after checking the tiles were dry using a damp meter, I started the application of the sealer. For this floor I applied seven coats of Tile Doctor Seal and Go for a satin finish. Tile Doctor Seal and Go is a specially formulated water-based sealer that provides both stain resistance and a durable low-sheen finish. It is perfect on a floor of this age where it leaves a lovely finish and will remain durable in what is a essentially a high traffic area.

Victorian Tiled Hallway After Renovation Cwmbran Wales

Although we didn’t manage to sort out the area by the front door the client managed to fit a made to measure coir door mat along with carpet bar which was quite practical and looked fine so they were able to resolve that problem without blowing their budget.

The client was over the moon with results, the floor had a lovely pattern and the colours now shone through. I suggested the use of Tile Doctor Neutral Tile Cleaner to keep the floor clean and in good condition. It is neutral in pH so will ensure that the newly applied sealer stays in place and will ensure maintenance is nice and easy for them.


Professional Restoration of a Victorian Tiled Hallway in Monmouthshire

Restoring a Neglected Victorian Tiled Hallway in Cwmbran Read More »
Farmhouse Terracotta Tiled Floor Before After Clean Seal Symonds Yat

Terracotta Farmhouse Floor Renovated at Symonds Yat Holiday Home

The pictures below are of a Terracotta tiled floor that was laid in a Farmhouse in Symonds Yat around twenty years ago when the house was being renovated. The Terracotta tiles had been installed throughout the kitchen, utility and downstairs cloakroom and were well overdue a deep clean and seal.

Symonds Yat is a beautiful location amidst the fields of Wye Valley and set on the famous River Wye and is very popular with tourists. The farmhouse has been rented out as a holiday home for some time and with the floor looking faded and dull it was not giving the best impressions with visitors which is not good when you are using the property as a business.

Terracotta Tiled Floor Before Cleaning Symonds Yat Holiday Home

I visited the property to survey the floor as the picture’s customers send you never show up all the problems. I could immediately see the tiles were indeed in need of some tender love and care, the old sealer had long since eroded away and now the Terracotta was susceptible to dirt becoming ingrained. I carried out a test clean on a small area so they could see what the result might look like. They were over the moon with the test area and amazed that how much it would bring the floor back to life. I quoted them a price which they were happy to accept, and we booked the job in for later in the month.

Cleaning/Repairing a Terracotta Tiled Farmhouse Floor

To put the life back into the floor it needed to be stripped of any remaining sealer, cleaned and then resealed. I began this process by spraying the floor with a medium dilution of
Tile Doctor Remove and Go and left it to soak into the tile and grout for ten minutes. This product is designed to strip off old sealers from tile which is important as you will find the sealer will be completely worn off in the busier parts of the floor but will still be present around the edges etc. If you don’t strip off the sealer and apply a new sealer on top you will find the result becomes inconsistent and leaves a patchy finish.

After ten minutes the Remove and Go was scrubbed into the Terracotta using a rotary floor machine fitted with a black scrubbing pad. This action removed what was left of the old sealer and after rinsing and extracting I was able to move onto the cleaning process.

This process was repeated using Tile Doctor Pro-Clean which is tile and grout cleaning product that will remove ingrained dirt. As before the product was diluted, applied to the floor and after leaving it to dwell for a short while it was scrubbed in as before. Some of the grout and corners had to be done by hand as the rotary machine can struggle to reach in places. After rinsing off with water and extracting with a wet vacuum there were a few stubborn areas that required a repeat treatment, but we soon had the floor looking clean.

Terracotta Tiled Floor After Cleaning Symonds Yat Holiday Home

Sealing a Terracotta Tiled Farmhouse Floor

After leaving the tile and grout to dry off overnight I came back the next day and checked the floor was dry with the moisture meter. The readings were fine, so I began applying the sealer. I started with a single coat of Tile Doctor Colour Grow which is a colour enhancing product that seeps into the pores of the Terracotta protecting it from within. This was followed with seven coats of Tile Doctor Seal and Go. Terracotta is very porous and does take a lot of sealer.

Terracotta Tiled Floor After Cleaning and Sealing Symonds Yat Holiday Home

Once the sealer had dried the floor had a lovely satin finish that wasn’t too shiny. The client was over the moon with the restored floor and was keen for his next clients to see it.


Professional Restoration of a Terracotta Tiled Farmhouse Floor in Monmouthshire

Terracotta Farmhouse Floor Renovated at Symonds Yat Holiday Home Read More »
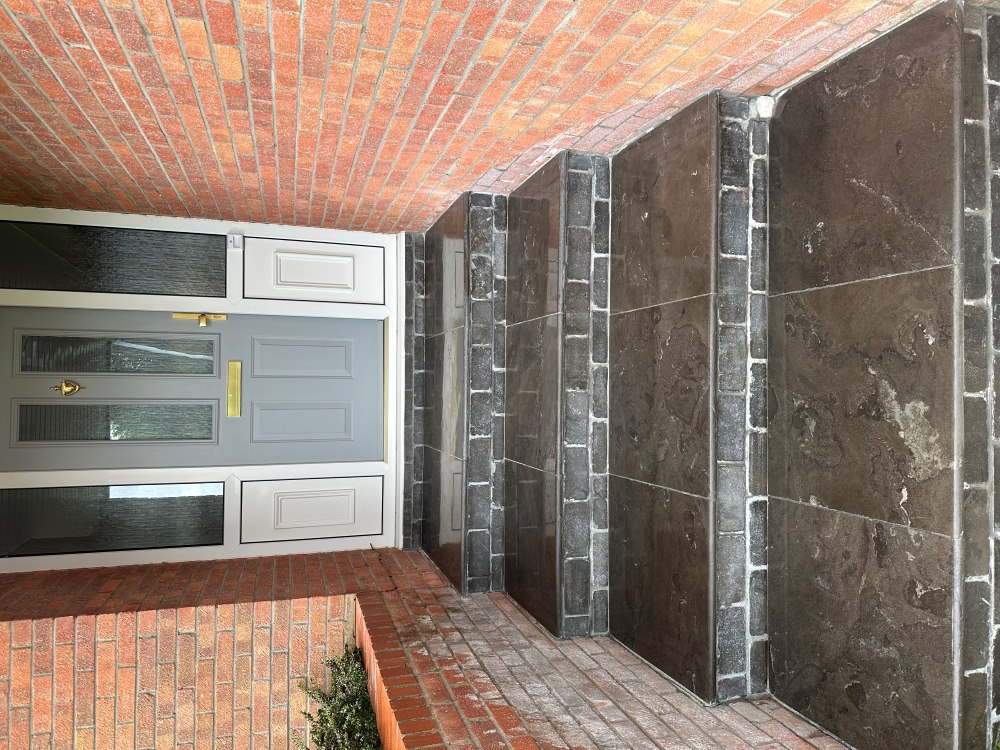
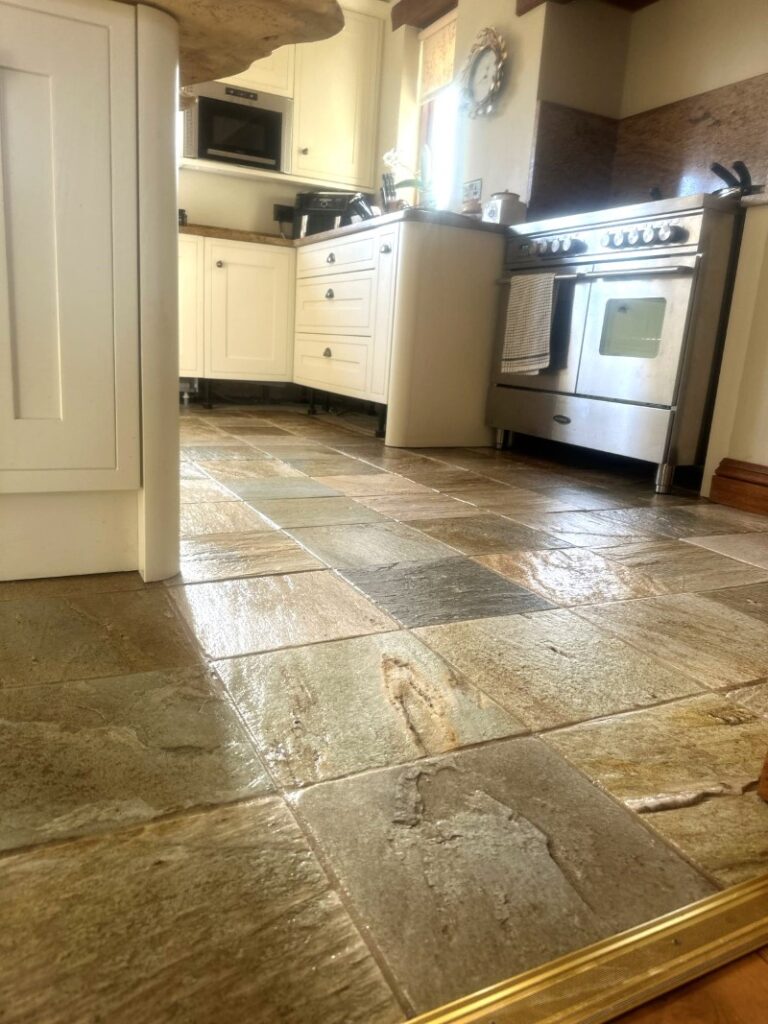
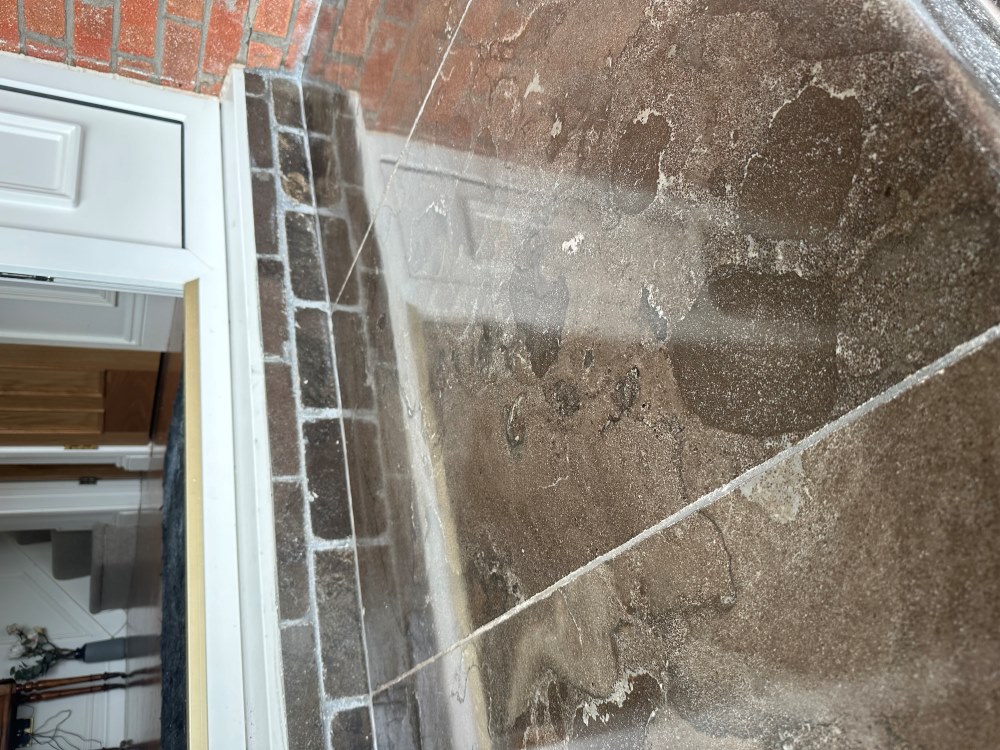
Chinese Slate Tiled Kitchen Floor Cleaning Chepstow

Nine Year Old Chinese Slate Floor Renovated in Chepstow

The tiles pictured are Chinese Slate which were laid in the Kitchen of a house in Chepstow around nine years ago. The town of Chepstow is located on the Welsh side of the River Seven and has the River Wye running through it.

Chinese Slate Tiled Kitchen Floor Before Cleaning Chepstow

The floor had not been professionally cleaned and sealed since installation. During this time the old sealer had mostly worn off allowing dirt to get into the pores of the stone leaving it looking dull, uninviting and dirty. The grout lines had also collected dirt and many of the lines had darkened.

Chinese Slate Tiled Kitchen Floor Before Cleaning Chepstow

I discussed with the client the process to get the floor cleaned and restored and demonstrated the effectiveness of the process on a small test area. They were impressed and were happy to go ahead with my quote, so we scheduled in the work which would take two days.

Cleaning a Chinese Slate Tiled Kitchen Floor

To get the floor clean and remove what was left of the old sealer I first made the floor wet and then added a strong dilution of Tile Doctor Pro-Clean mixed with Tile Doctor Remove and Go to give it extra power. This cleaning cocktail was left to soak into the tiles for ten minutes before being scrubbed in with a black scrubbing pad fitted to a rotary machine and by hand where necessary. This combination works well on really dirty floors such as this.

The scrubbing action released the years of dirt from the pores of the Slate and it wasn’t long before the cleaning solution turned black. This was then extracted off the floor using a wet vacuum. We then gave the floor a thorough inspection. There were one or two areas that were particularly stubborn, so these areas were retreated using the same process and the grout scrubbed by hand using more Tile Doctor Pro Clean.

The floor was then given another rinse with water and then dried as much as possible with the wet vacuum. This got the floor dry, but it would need to be completely dry before sealing so it was then left to dry off fully overnight.

Sealing a Chinese Slate Tiled Kitchen Floor

I came back the next day to seal the floor first checking the moisture level of the stone by taking readings with a damp meter to ensure it was dry. I chose to use Tile Doctor Colour Grow for the sealer as the colour enhancing formula would be the best product to bring out the natural colours in the Chinese slate. Colour Grow is an impregnating sealer which will provides durable protection as well as allowing the surface to breath. Three coats were applied, allowing each to dry before applying the next one.

Chinese Slate Tiled Kitchen Floor After Cleaning Chepstow

The client was so happy, so much that she said it looked better than when first laid!

I discussed aftercare with her and recommended the use of Tile Doctor Neutral Tile Cleaner, it’s pH balanced so it won’t prematurely erode the sealer which can be the problem with stronger products you find in supermarkets. It comes in concentrated form so one bottle lasts a long time.

Chinese Slate Tiled Kitchen Floor After Cleaning Chepstow


Professional Restoration of a Chinese Slate Tiled Kitchen Floor in Monmouthshire

Nine Year Old Chinese Slate Floor Renovated in Chepstow Read More »
Scroll to Top